


I am in the process of making a small mason jar lamp for my night stand. I finished making the lamp base, but still need to make a lampshade for it. Here is what I did.
I first drilled a hole on the back of the jar near the bottom for the cords. In another post I will describe how I created the hole in the jar.

Next, I painted the inside of jar blue. The hole/paint combination can make a mess, so be careful.


I used the parts from an old lamp. If you have an old lamp that you don't want, I will describe how I took this one apart. If you don't have an extra lamp around, you can buy the parts at a hardware store or online.


First, UNPLUG THE LAMP!!
Then I unscrewed the casing to expose the wire connections. The wires are held in with screws, so I unscrewed these connections with a phillips screw driver. I used a piece of tape to mark which wire connected to each screw.


Once the wires are free, I pulled the wires out of the lamp base, and fed them through the hole in the bottom of the mason jar.

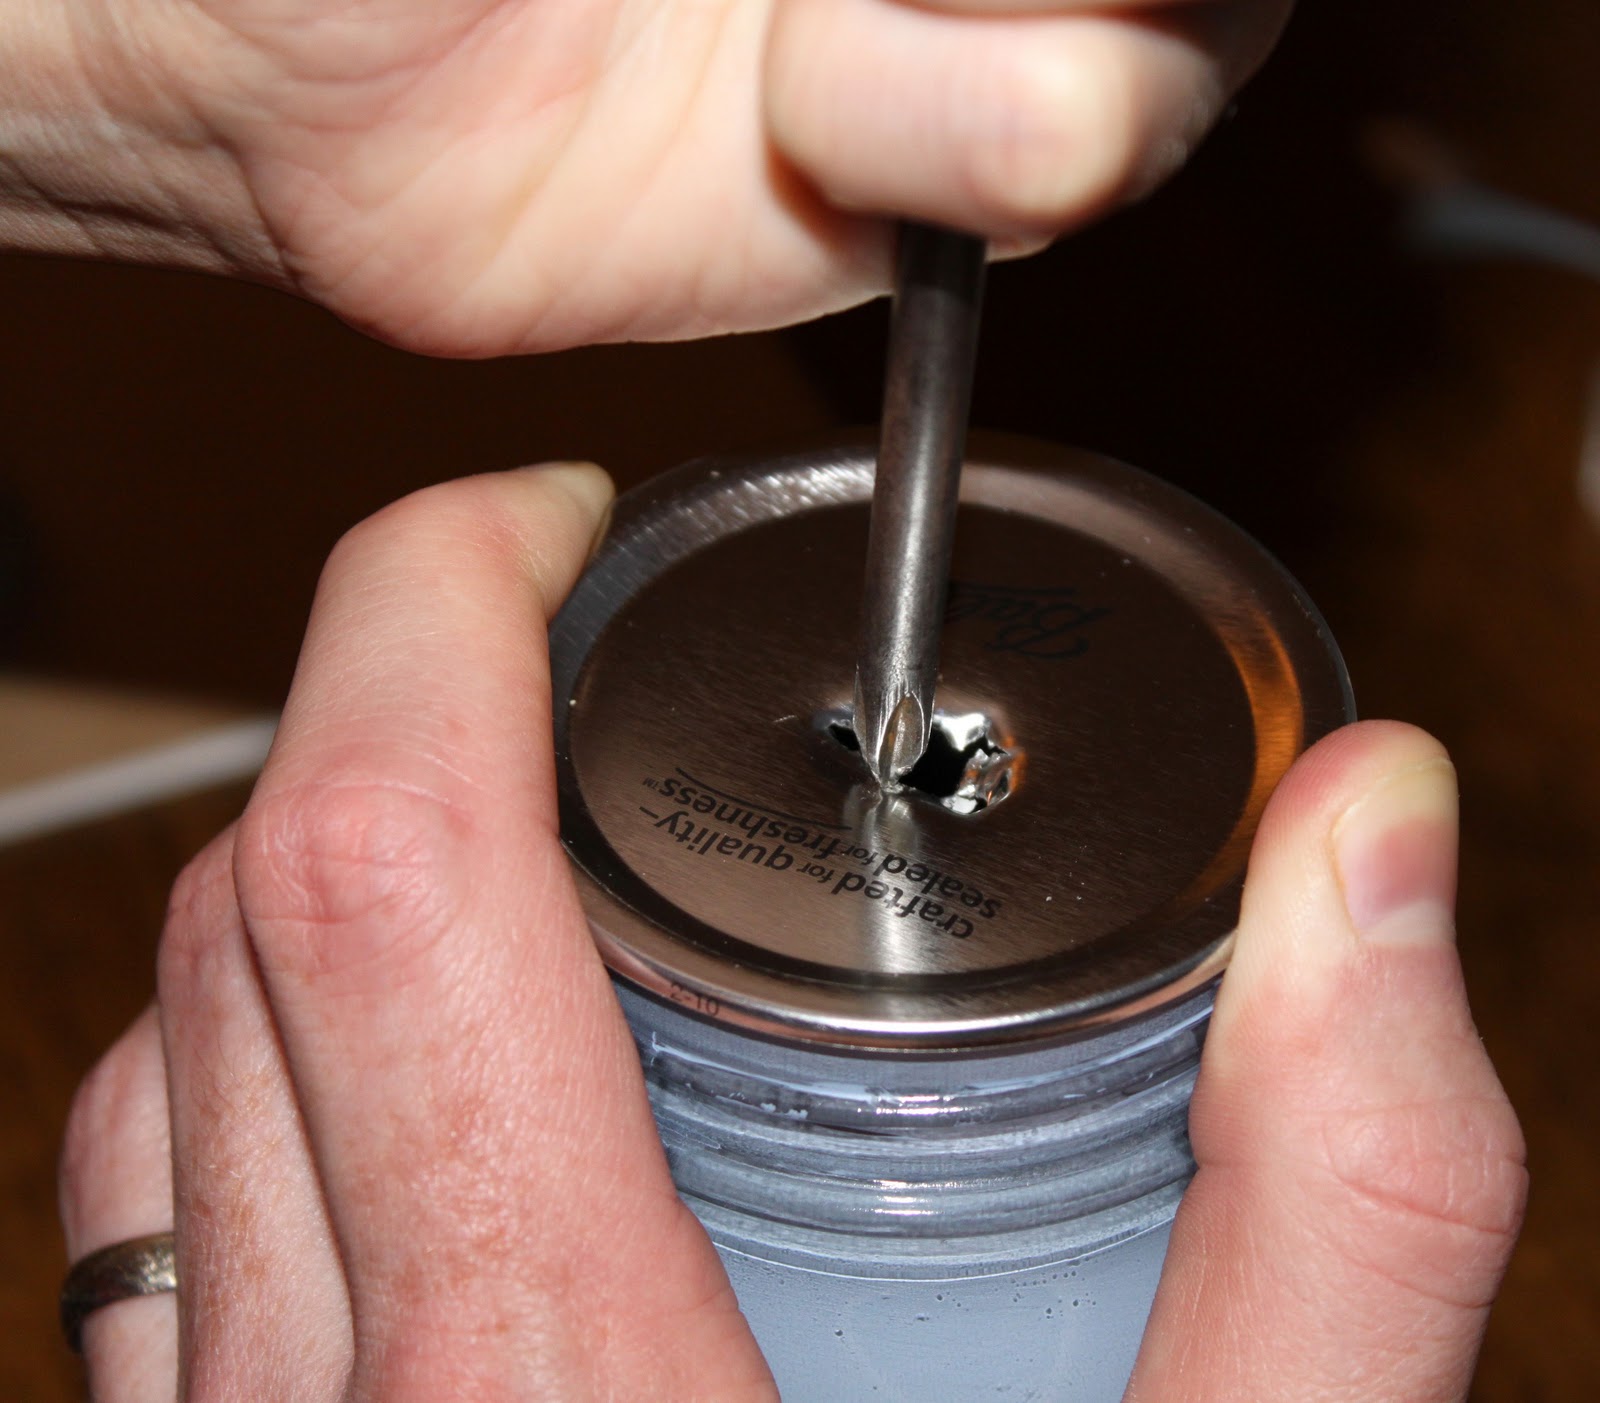
The next step was creating a hole in the lid for the bulb holder thing to rest. I used a hammer and screw driver to nail a hole in the top. Then I reconnected the wires and screwed the casing back together.


Linked to:
The Crafty Nest
Just a Girl
Chic on a Shoestring Decorating

Looking great! I'm gonna have to make me one! It's much cuter than some of the old lamps I've got hanging around!
ReplyDelete